I’ve been studying XC skiing in all its forms for decades.
This here is my teaching method for SKATE SKIING. (I have a similar article here for CLASSIC stride skiing.)
My goal is for learners to have fun every step of the way — no wasted motion or time, no awkward static drills. I cover a wide range, from never-evers to advanced. I glean what has worked best for me from all the sources available. The results I go for highlight fun and play like I haven’t seen elsewhere — even though these aspects are absolutely needed for XC to become popular!
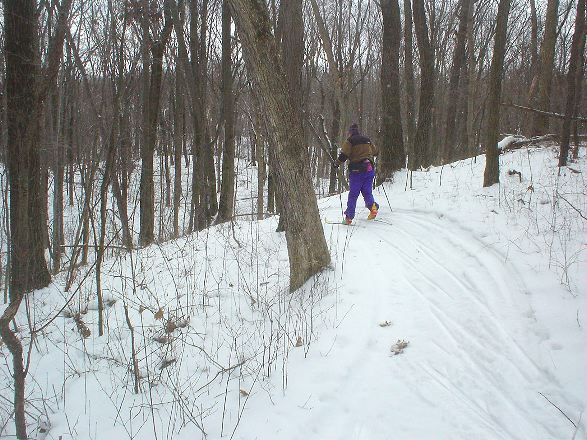
Skate skiing is fun and fast on prepared courses with the proper gear. It’s no harder than regular classic skiing. Skate skiing easily delivers the 3 virtues of all snowsport: *glide, *rhythm, *pay-off. Don’t think it’s “harder” or that you have to be “fitter.” Don’t be a struggling ski-waddler. Here’s the fun way to do it. Check it out!
My big point about skating is that it’s no more or less work than stride skiing. I often hear and read about skating that it’s “a lot more work!” It’s not.
The main thing is that skating really doesn’t have a Trail Skiing or touring aspect. It always involves a groomed trail, or firm, fast crust. These are situations of speed just as they would be if you were on Classic skis. There are no wide, heavy, robust skating skis or beefy skate boots and bindings. All skate gear is basically race gear so it’s all a lot faster than any touring on ungroomed trails would be.
If you compare apples to apples, though, skating isn’t all that much faster, especially once you get into hilly terrain. It’s only 10% or so faster. And on a steep uphill where you can still stride you might be wasting a lot of motion with the splayed skate skis. In such conditions a skilled strider can keep pace with skaters just fine.
Skating does have a longer power-phase so you can put more power into skating if you like, to get more speed. But you can also do skating at any effort level you like. You can go easy when skating! It’s up to you. But like with any skiing, if you don’t know what you’re doing you’ll waste energy and work more than you need to. A lot of times, people work too hard because their erstwhile helper tells them crazy things or because they’re trying to follow crazy misinformation.
I’m also writing this — and will make some videos — because the other info I see out there, including the official methodology, is all race oriented. It’s showing people in lycra bodysuits and elite physiques. It often uses fancy medical terminology. “Extension through the obliques!” …C’mon! Anybody can do this, for any reason. You don’t need no steenking tech-nerd-geekery. I’m guessing that 90% of the folks who could be having fun with ski skating won’t be racers or elites. Actually, the sport has shrunk enough that mostly only “Type A’s on Overdrive” seem to be involved, but I’d rather see us bringing in, um, everybody. Coz it’s fun. Like rollerblading. No need to get fancy, tricky or complicated.
I also hear that “it’s a lot faster than regular skiing!” For beginning skiers it really can be. For intermediates it’s about 25% faster. For experts it’s only about 10% faster. By waddling, as a beginner, maybe even with no instruction, you can move along on the flats with skating. Wheeee! It’s harder to zip along with classic striding skis using just the uninformed waddle method. With instruction both modes become HUGELY easier. Classic increases more in efficiency with instruction. With skating the payoffs come more up front, but instruction helps hugely with it as well.
In short, skating is faster because it let’s you put out more power. How? Its power-phase is longer and the power portion also includes glide! With striding the ski has to STOP each time! And when the skis aren’t stopping — as when doublepoling in Classic skiing — they aren’t powering. Yet skating loses some efficiency because the power is going SIDEWAYS quite a bit. The net effect, though, is a gain. …However, when uphills get steep enough that the skis start to point much more to the sides then Classic can suddenly compare quite a bit more favorably — and an Expert strider can pass an Intermediate skater. …Physics is cool!
Skating also needs a groomed trail, or crust snow, and it really wants special gear — longer, light/stiff poles, skis with only glide-wax on them, stiff boots. At least you for sure need a ski with only glide wax. You can fudge shorter poles, etc., for a little while just to play around or get a feel for skating, or in a pinch when out striding. Another benefit of skating is that the waxing is simpler since there’s no kickwax. But all waxing is kinda fun because you’re using it to get more speed and easiness without more work!
These notes follow a step by step progression. Work through them from the first to the last and you’ll be on your way!
They start from the very beginning. You can be a never-ever skier and end up skating by the end of this article.
Background
I’ve taken the best of my experiences learning and teaching skiing, and watching all the videos and reading all the books and articles, and distilled it here. I’m giving you way less than half of the variety of tips and drills I’ve encountered — because the majority of things I see seem bad or unneeded. I don’t like static or asymmetric drills. I want everything folks do to feel good and to definitely move them closer to fun with as little duplication as possible.
My approach is simple teaching motions, and the fewest of them.
Yes, I know everybody learns differently. And if I was teaching you a class I’d see what you’re blazing thru and where you’re bogging down, but all this stuff is gonna help. A lot.
Really, I should have a few pics or a video for every one of these line items. Maybe someday I will and that will be my book! : )
Clothes & Treats
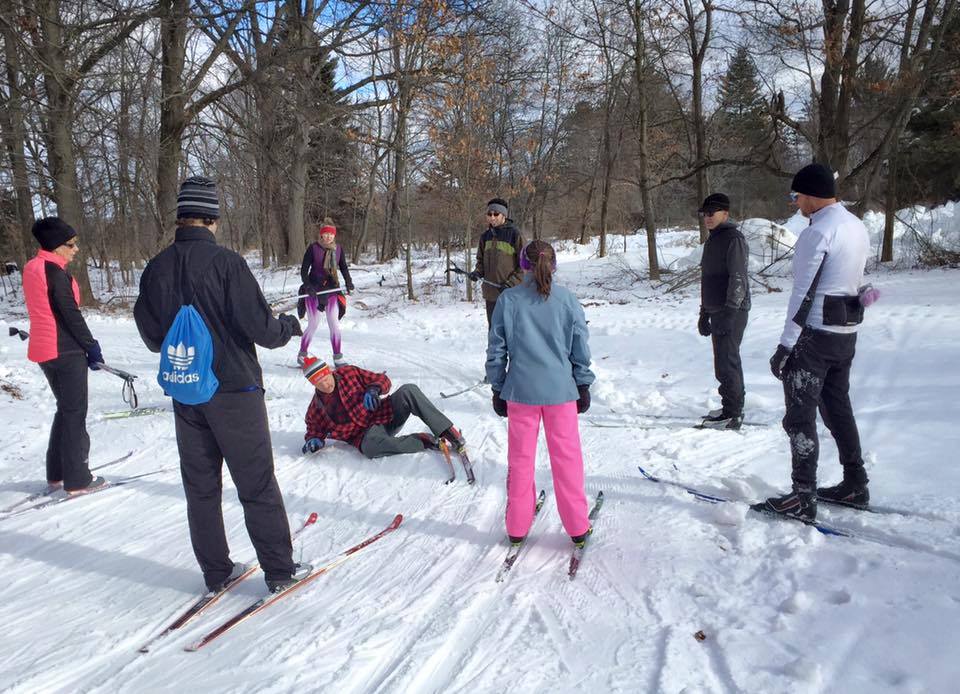
Don’t wear too much. Skiing isn’t fancy and it keeps you warm. You’ll wear quite a bit less than if you go out for a winter walk. If you’re only going out for an hour then light gloves, light hat, pants, and two light layers on top are all you need. If it’s over 30F there’s every chance that as you become more confident and ski with gusto that you won’t even need a hat or gloves. They’re nice but you don’t really need them. Maybe a light jacket as you’re first warming up while you learn. Light/med wool is best for everything, top/bottom, but anything is fine. Jeans are fine! Bring a small pack to put clothes in as you get hot and to carry your snacks and bevs. If/when you fall, just brush off the snow so it doesn’t melt on you. (Have someone help brush you off.) If you’re ever going out for hours or in strong winds, then adjust for that. It’s no biggie.
Ideally, wear clothes that look good. Colorful!
Make sure you have a bota bag with apple juice (maybe white wine) — and orange slices and maybe some chocolate. If you’ll be out an hour then a little smoked fish, stinky cheese and crackers won’t hurt. (in your small backpack bring an extra vest/jacket to put on while you stop, and maybe little square of ensolite foam to sit on.)
Roots
Remind yourself: what is the fun of skiing? It’s nothing fancy and it’s not about copying those with different goals. It’s glide, rhythm and payoff.
We get all these good things by weighting, unweighting and extra-weighting our skis. By bouncing, pouncing, flexing, kicking, pushing. All skiing or glidesport is one, so XC works like alpine skiing, ice skating, or skateboarding. Any kind of scooter. The speed doesn’t matter. It’s relative. What you look like doesn’t matter. Just those 3 things matter that I listed up there.
Weighting means we’re standing on our skis — and gliding. Unweighting lets us easily move our skis around. Extra-weighting means pushing — and lets us give the propulsion
Casual skiing looks different from racing. It’s good to know the basics of racing since sometimes race moves come in handy — but casual skiers take it easy and often do things that add more to fun than to speed — so don’t judge the one by the other. They do different things sometimes. And that’s OK.
Start at the Start
Practice the ready stance: stand a bit like a wrestler. Hands forward. Knees and ankles lightly bent. Shoulders slumped. Chin down a bit so neck is neutral, not tense. Weight evenly on your feet, but maybe a bit forward. They also call it the gunfighter pose.
Take a SMALL STEP FORWARD (12″) and stand on one foot with the knee and ankle both flexed a bit and with a slight forward tilt of torso. Let rear leg be unweighted — let it float/lift slightly up off the ground and hang there. Standing leg is in tension but calm — do this for both feet.
The previous tip is your biggest ski lesson! How simple! When you’re skiing if you’re not in this position you’ll probably have your weight too far back and you’ll be kicking off your heels and your poling hands will be too high and too far in front of you. Everything connects together! The weight-back posture is inefficient. It isn’t necessarily bad, though! You might be relaxed and just tooling along looking at the scenery. Who cares about speed, right? It’ll work fine where the skiing is easy. But you sure won’t be able to easily get up a hill like that. To go up you need to stand up and tilt a bit forward and flex that ankle and put all your weight on one foot! This applies to both skating and classic. So go into idle-mode when you like — but know how to do it right when you need a little ‘pop’ or some boost.
The Names
Skating has 5 gears to help you go up the steepest hills the easiest (lowest gear) or to zoom down a gradual downhill the fastest (biggest gear) — but just 3 of the gears will do you fine as you’re learning. Indeed, many good citizen racers and funsy skiers mostly use just ONE kind of ski-skating. It’s called the “V1” and you can do a lot with it and play with it and change it around. (It’s called other names in other countries. “Offset” in Canada. Maybe “paddle dance” elsewhere in non-English.)
I think part of the problem with the lack of popularity in skiing in the USA is the branding: the lame names for our ski moves. But what would be better? Maybe someone with charisma and marketing savvy could chime in and let us know?
I’ll name and describe the techniques here but don’t try to do them based on this info. The how-to section is for that.
Let’s start from our biggest, fastest gear then gear down to climbing the steepest hills.
*Freeskate: Fifth gear. This is skating down a slight grade without using any poling. You go like a speedskater and maybe swing each of your arms back and forth in front of you or from side to side as you skate. You’re going too fast to use the poles.
*V2A: Fourth gear. Umm, here’s our weakest name. Or, V2-Alternate. Or, Open Field. Help? Skate with your legs, (making “V†marks on the snow) while doublepoling with every other skate. It is so fast that you only want to squeeze in a poling action half the time. This move is for fast conditions, often on the flats. Start by poling and skating on one side, say the left, then over to the right side where you just glide with both of your arms flung back. Now whip your arms up again while skating again from the right foot back over to the left. Then doublepole downward and skate off the left again. It’s quite a natural technique and it’s what the sport relied on for a couple years before we invented the other moves. This move tends to bog down on uphills. (It was the second skate technique invented. And we used to have to use it on all the uphills. It sucked.) (In some countries this is called the Two-skate, since you skate twice for each poling.)
*V2: Third gear. Doublepoling with every skate action. For working while you skate and for slight uphills. It’s for conditions that have some friction so you add poling power to each dose of kicking power. You doublepole and at the same time skate with, say, your left foot over to your right foot. Then you rise up and doublepole and skate off of your right foot over to your left. Rise up and doublepole and skate back to the right. This move requires more balance than the others, but with the right equipment and a few tricks it’s easy to do and relaxing. (In some countries this is called the One-skate, since you skate once for each poling.)
*Marathon: Rarely used anymore, but I’ll mention it. The first-ever skate-skiing move invented. Use it when it works or is fun. Sometimes your skis are gliding best in the track and it’s OK to skate from the track without anyone getting mad at you for marking up the track. This move started the battle between skaters and striders because at first it was done in the tracks and across them all and it chews them up and leaves lumps in them. It’s best on the flats or fast conditions or slight downhills. What you do is scooter. You put one ski in the outer classic ski track then simultaneously doublepole and skate at an angle to it, starting with the tail of the ski of the skating foot crossing the tail of the gliding ski that is down in the track. You unweight the gliding ski a bit as you skate and pole then you glide with the ski that just skated totally unweighted and floating off the ground and your poling arms behind you. Then you swoop your poles back forward and up and set the skating ski back at an angle next to the gliding ski and skate and pole again. Over and over. Don’t ever do this on a doubleset classic trail. Only do it with the skating ski working in a skating lane of a trail. It will somewhat damage the outermost striding track. This move can be helpful when skiing on a well-worn trail that is groomed for both striding and skating and the outermost stride track is ALREADY nearly obliterated, yet you can still get some tracking guidance from what remains. It can be good when you’re tired. It isn’t placed as a “gear†in the series. It just has times when it’s helpful or fun.
*V1: Second gear. The most versatile and useful of all skate moves! The technique for climbing most hills, but easily adapted to also work on the flats or slight uphills. Restful and stable. (We were so relieved when this move was invented! We could finally climb fast and easy!) It’s not intuitive but is readily taught and then one very naturally senses how to modify it for all uses. Quite a few skaters use this move nearly all the time. Remember, the how-to comes later. You doublepole and skate off of your left foot onto your right. Then you skate off of your right while swinging your arms back forward again. You land on your left foot, then start poling and skating off of the left. The poles are held assymetrically with the outside pole held upright and close to your head and the inside pole planted further back and to the side and so the polehand starts lower and in front of the shoulder. It’s good for uphills because the poling and skating happen simultaneously. Both feet should often work equally but sometimes the outer foot takes a bigger step and kicks harder. The outer side being poled on is called the strong-side. The off-side being poled over to is called the weak-side. On uphills you immediately skate back off of the weak-side to get back to the power. But for the flats you can hang out a bit on the weak-side to enjoy some glide. Then the technique is sometimes called “ride-and-glide.†It can start to function more like marathon skating with a bit of scootering aspect to it. Indeed, it can segue into marathoning if you have an ethically usable track next to you. (It’s called Offset in Canada and other places, because the poling is offset from the skating.)
*Diagonal Skate: First gear. This is for the steepest uphills. It’s like the herringbone stride in classic only the feet keep moving. You pole with one arm for each opposite skate.
Learn a Lot Just Standing there!
Time for more dryland motions. No skis, poles or snow needed!
Swing your arms together and then separated, fore and aft, 45 degrees bent, let em fling, relaxed, lead with front of hand, make a motion like tossing cup of water down trail in front of you.
To practice skating leg action, stand with legs shoulder-width apart then shift hips to the side, over one foot so that the other foot lifts off the ground. Back’n’forth. Each foot lifting off in turn. Now shift hip over and down, flexing knee and ankle a fair bit, letting other foot lift up, then stand up and shift to other side and do the same, going up and down on the same foot. In a kind of upside-down U motion. Now let’s try a different leg/hip action: Stand on one foot, flex, lower your hip, then shift to the other foot, stand up, lower, then shift to other foot. In a kind of regular U-shape motion. So, that’s a couple different ways you’re going to achieve the needed weight transfer, and leg action for propulsion.
Add some umph and hop from side to side. Not too far. Whatever feels ok. It can be very light and small. Try to land in balance on the other foot and let your off-leg float up like an outrigger. You don’t have to freeze anywhere. Good leg action in skating is a push to the SIDE only. With your whole foot. Push from the heel, then toe-off. Gliding happens more when you stand up on a ski. Powering happens when you flex deeper in knee/ankle and give a shove to the side.
More Background
Ski-skating is like ice skating or inline skating. But many people do those kinds of skating wrong. And it’s not like figure-skating! And it’s not like the running-action in hockey skating. In short: there’s no toe-off to the rear. You don’t step or kick BACK. It’s more like speed-skating — they push to the side only.
Also, ski-skating is popular because it can work pretty good even when done wrong. Altho one does work quite a bit more when doing it badly. It’s a bit like downhill skiing: most people do it so badly that it’s maybe only half like skiing and half like hockey skating: they skid down hills swinging from side to side. They do have a primitive rhythm, but one that doesn’t come from weighting and unweighting or using from the skis to carve or turn: they more just pivot their waist, swing their arms, and shove their heels out from side to side, while sticking their butts out and reaching hands forward. The speed is fun, though, so people keep paying to do it. But, remember, speed is relative: 20mph on heavy powerful equipment wearing thick clothes gives one kind of speed feeling. 10mph on ultralight gear wearing thin clothes gives another kind of feeling. 30mph on ultralight gear feels different yet again! As does 5mph gliding UP a hill. All are slower — and different — from driving a car. Downhill mogul skiers might only go 15mph down the hill but they’re getting a lot of fun from the rhythm and flexing of the turning with the bumps. Same with slalom skiers. They turn so much and carve so hard that they aren’t really going that fast down the hill. XC skiing has a different kind of rhythm. Also, control is key. Conditions and course limit the speed to what can be controlled given the kind of gear being used.
The leg and arm actions and posture of classic ski-striding and ski-skating are the same — just with skating the kick is to the side — that’s the only difference! The thing with striding is that to get power the foot stops for an instant, grips, and you leap forward off of the stopped foot. With skating the foot never stops gliding. That’s why it’s faster. Though there is a beginning and end to each push. As you become more skilled the speeds of the two modes get closer together. (Elite skaters are only about 10% faster than striders.)
What makes skating easy and fun for people is there’s no worry about kickwax or getting grip on uphills. And there’s no stop-part to coordinate. Gliding happens all the time as you go along. Even if you’re casual or sloppy there’s still gliding! There’s no worry about slipping.
The big problem in stride-skiing is there’s much less room for messing-up. If your butt is back in skating, you just work harder, but you can still get around and you can still get up hills even though it’s a ton of work. If you don’t stand up on your skis in striding then you can’t get grip to ski up hills and you’ll suffer and hate it or just bail out on skiing and do a herringbone instead. Thankfully, learning to get grip in classic-striding is easy. Sadly, too many put up with too much work in skating even though they can make it work.
Also, in skating if you don’t weight each foot evenly and push to the side you can “wash out” the tips of your skate-skis quite easily and waste effort that way, too. If a ski doesn’t have your full weight on it, it can easily wash out. And by not being relaxed as you move from ski to ski in good timing you can also waste effort. So skating can seem “hard” — even though it isn’t! Though to take advantage of the greater speed you are working more. And it’s paying off more! So you’ll say “it’s faster but more work.” But you can dial-back on skating to whatever effort you like. Really, one kind of skiing isn’t harder than another. It’s up to us!
Time for Arm-action in Dryland
Now add in arm action to complete the various skate moves. We can easily do them all on dry land, just stepping around in a room or ouside, with no gear. In fact for one of the moves doing it on dryland is the easiest way to master it on snow.
You’re going to want to SEE some people ski-skating in the various techniques so you can imitate their arm action. It’s too much to explain here. Well, not THAT much but more than I feel like right now.
Dryland for Skating
*Diagonal Skate: First gear. This is for the steepest uphills. It’s like the herringbone stride in classic only the feet keep moving. You pole with one arm for each opposite skate.
Learn a Lot Just Standing there!
Time for more dryland motions. No skis, poles or snow needed!
Swing your arms together and then separated, fore and aft, 45 degrees bent, let em fling, relaxed, lead with front of hand, make a motion like tossing cup of water down trail in front of you.
To practice skating leg action, stand with legs shoulder-width apart then shift hips to the side, over one foot so that the other foot lifts off the ground. Back’n’forth. Each foot lifting off in turn. Now shift hip over and down, flexing knee and ankle a fair bit, letting other foot lift up, then stand up and shift to other side and do the same, going up and down on the same foot. In a kind of upside-down U motion. Now let’s try a different leg/hip action: Stand on one foot, flex, lower your hip, then shift to the other foot, stand up, lower, then shift to other foot. In a kind of regular U-shape motion. So, that’s a couple different ways you’re going to achieve the needed weight transfer, and leg action for propulsion.
Add some umph and hop from side to side. Not too far. Whatever feels ok. It can be very light and small. Try to land in balance on the other foot and let your off-leg float up like an outrigger. You don’t have to freeze anywhere. Good leg action in skating is a push to the SIDE only. With your whole foot. Push from the heel, then toe-off. Gliding happens more when you stand up on a ski. Powering happens when you flex deeper in knee/ankle and give a shove to the side.
More Background
Ski-skating is like ice skating or inline skating. But many people do those kinds of skating wrong. And it’s not like figure-skating! And it’s not like the running-action in hockey skating. In short: there’s no toe-off to the rear. You don’t step or kick BACK. It’s more like speed-skating — they push to the side only.
Also, ski-skating is popular because it can work pretty good even when done wrong. Altho one does work quite a bit more when doing it badly. It’s a bit like downhill skiing: most people do it so badly that it’s maybe only half like skiing and half like hockey skating: they skid down hills swinging from side to side. They do have a primitive rhythm, but one that doesn’t come from weighting and unweighting or using from the skis to carve or turn: they more just pivot their waist, swing their arms, and shove their heels out from side to side, while sticking their butts out and reaching hands forward. The speed is fun, though, so people keep paying to do it. But, remember, speed is relative: 20mph on heavy powerful equipment wearing thick clothes gives one kind of speed feeling. 10mph on ultralight gear wearing thin clothes gives another kind of feeling. 30mph on ultralight gear feels different yet again! As does 5mph gliding UP a hill. All are slower — and different — from driving a car. Downhill mogul skiers might only go 15mph down the hill but they’re getting a lot of fun from the rhythm and flexing of the turning with the bumps. Same with slalom skiers. They turn so much and carve so hard that they aren’t really going that fast down the hill. XC skiing has a different kind of rhythm. Also, control is key. Conditions and course limit the speed to what can be controlled given the kind of gear being used.
The leg and arm actions and posture of classic ski-striding and ski-skating are the same — just with skating the kick is to the side — that’s the only difference! The thing with striding is that to get power the foot stops for an instant, grips, and you leap forward off of the stopped foot. With skating the foot never stops gliding. That’s why it’s faster. Though there is a beginning and end to each push. As you become more skilled the speeds of the two modes get closer together. (Elite skaters are only about 10% faster than striders.)
What makes skating easy and fun for people is there’s no worry about kickwax or getting grip on uphills. And there’s no stop-part to coordinate. Gliding happens all the time as you go along. Even if you’re casual or sloppy there’s still gliding! There’s no worry about slipping.
The big problem in stride-skiing is there’s much less room for messing-up. If your butt is back in skating, you just work harder, but you can still get around and you can still get up hills even though it’s a ton of work. If you don’t stand up on your skis in striding then you can’t get grip to ski up hills and you’ll suffer and hate it or just bail out on skiing and do a herringbone instead. Thankfully, learning to get grip in classic-striding is easy. Sadly, too many put up with too much work in skating even though they can make it work.
Also, in skating if you don’t weight each foot evenly and push to the side you can “wash out” the tips of your skate-skis quite easily and waste effort that way, too. If a ski doesn’t have your full weight on it, it can easily wash out. And by not being relaxed as you move from ski to ski in good timing you can also waste effort. So skating can seem “hard” — even though it isn’t! Though to take advantage of the greater speed you are working more. And it’s paying off more! So you’ll say “it’s faster but more work.” But you can dial-back on skating to whatever effort you like. Really, one kind of skiing isn’t harder than another. It’s up to us!
Time for Arm-action in Dryland
Let’s now add in arm action to our dryland imitations to complete the various skate moves. We can easily do them all on dry land, just stepping around in a room or outside, with no gear. In fact for one of the moves doing it on dryland is the easiest way to master it on snow.
Yes, this is a time for ski drills. This can feel like not-fun and not-skiing. We’re itching to get on snow and have the fun! …Patience. It won’t take long but it will get you set for the real thing.
One thing to practice as you go through your dryland imitation a few times is just stepping from side to side not forward. In fact, a proper skating kick shoves forward with the heel weighted and pressed down as long as possible. So doing it best on dryland means moving BACKWARD. But we won’t be that extreme.
Really, this would be a great time to look at some YouTubes. However, ummm, at this time I can’t find any simple ones that show this basic dryland imitation. I will make some and post them asap. Really!
I’ll try to get some photos to show here as well.
Words are kind of stupid in this situation, but I’ll try. Who could ever learn from such things? But I feel obliged for completeness.
*Diagonal Skate: (1st gear) Easy. Step back and forth raising the opposite hand in front of your shoulder then swinging it down as you step. Flex your knee downward just before you step over, straighten as you step.
*V1: (2nd gear) Stand centered over your right foot with your left toe a few inches to the rear and touching out to the side just beyond being below your left shoulder. Bend your right leg a bit and flex the right ankle. You’re poised over that right foot. Bend your right arm and raise your right hand up near your head about shoulder height. Bend your left arm and raise it about as high as your lower rib-cage below your left shoulder. Now pretend to do a doublepole and step or pivot over to your left foot. Your arms are now extended down and somewhat to the rear and your body is centered over your left foot (with bent left knee and ankle) and your right toe is touching the ground. Now step or shift back to the right. You don’t need to lift your feet to do this. But raise your hands back to the first position as you shift back to the right. So it’s hands up on the right, shift to the left while moving the hands down. In this description the right side is the strong-side. The move should be able to be done equally on both sides, but people sometimes have “handedness†and prefer a side. The V1 action is described as “3 1 3 1 3 1 …†It’s helpful to say it aloud. The “3†means that on the strong-side you set the ski and plant the poles at the same time. You kind of fall onto the poles and ski simultaneously. 3 things hit the ground at once. Then you power all 3. The powering sends you over to the weak-side where you sometimes glide a bit. You can hang out longer or shorter on the weak-side depending on the speed of the terrain or the grade of the climb.
*Marathon: There is no great benefit to doing dryland imitation for this move since it’s about scootering, but you could put one foot next to the other, angle it out, then step over to it then step off of it as you raise and bend then lower and straighten your arms.
*V2: (3rd gear): Dryland HUGELY helps you learn, get a feel for, and improve this technique! In fact, dryland is a must. So let’s see what words can do. Stand up with a slight forward tilt from your ankle and centered on your right foot with both arms raised and bent with your hands in front of but near your head above your shoulders at ear-height. Your left toe touches the ground off to the side a few inches beyond your left shoulder and a couple inches behind the right foot. Now pole down and bend your right knee and step over to your left foot. Now your right toe is touching the ground and you are centered over your left foot, arms back. Raise your hands up above your shoulders next to your ears. Now pole down, bend your left knee and shift over to the right. That’s it. Do that a few times. Now get bouncy and jump from foot to foot while doing the hand-action. Let the off foot come off the ground several inches and hang there an instant then swing over and “gather up†under your right hip near the strong-side so you can focus all your weight there then it swings back as you jump back over to it. You could let your two feet click together in that “gathering†phase as you’re poling and flexing the skate-side leg. Are you wobbly when you try to add a hop? If so I find that minimizing hand/arm action helps, as does less torso motion. Turn the poling into “flicking.†And just keep a stable torso tilt going with a little crunch-compression. Also, hopping over to a straight glide-leg, letting your leg-bones give restful structure to the pose, can help. Having the off-leg and finished arms all floating out to the sides acts like balancing poles for a tightrope walker.
*V2-Alternate: (4th gear) Imitation doesn’t hurt, but dryland isn’t known to benefit known weakpoints in this technique. Stand on your right foot with your hands in the air. Pole down, compress your torso down a fair bit (more than with V2) then after you’re nearly done poling, jump over to the left foot. Arms down. Jump back over to the right foot, starting with your arms down and whipping them up. Finish raising your arms once on your right foot. The arm-whip gives reactive power to the weak-side skate-off. The finished arms act as balancing poles for gliding on the weak-side. Enjoy the hang-time. The faster the conditions, the longer the hang-time. Repeat.
*Freeskate: (5th gear) Imitate for grins. Doing so doesn’t help any known weakpoint. The arms swing side to side in front of you as you step from foot to foot. Or you can tuck your imaginary poles under your arms then step from foot to foot.
Almost Ready to Ski!
Put poles on right — hand up thru, then grab down onto strap and pole
Click into skis — press button with pole can help — if snow is plugging, kick at binding just behind the slot — if still won’t go in, scrape under with pole-tip — after one clicks in, kick other boot into back of clicked-in boot.
Since you’re going to fall at some point, probably soon, let’s learn how. When you fall what you want to do is to try to fall a bit back and to the side — on a butt cheek. So just fall right now. Plop. Now, let’s get up. …There’s only one way to get up: get your poles pointed behind you and sort out your skis side by side going across any slope then get your hands on the ground toward the front of you and put a knee down pointing forward. Push off the ground with a hand. Your hands and knees should be toward the fronts of your skis. Your heel is free and you can pivot at your toe. It’s OK if your rear foot is tilted a bit but don’t stress it much. Put most weight on a level, flat front foot. If you try to do any pushing with your hands toward the rear half of the skis you won’t be able to get up. Skate poles are longer and harder to use to help you get up but you can angle them and use them a bit. Don’t break them!
Now, with our skis on, let’s do circles and side steps. Keeping your tails close to each other step in a circle in a fan shape, around and around. Both directions. his teaches turning. You’ll also ski-skate with your tips pointed away from each other in a Vee.
Keeping your tips pointed to each other, step in a circle by leading with your heels, each way, making a star pattern. This gets you comfy with sticking out a heel. This will be how you brake while skiing. To slow down you’ll do a snowplow skid by stepping out onto a ski that is shoved with its heel out to the side, tilting it inward then weighting it so it skids.
Now make a star pattern each way by stepping around w your tips while keep your tails closer together.
Now put your skis parallel and step to the sides a few times each way — your usual skate-powering will be a pushing to the side (but with skis in more of a Vee).
Now ski in circles. Angle your outside ski outward and scooter off it and turn left (or right) around and around. Both ways. Use your poles for balance if you like — you can have some glide on both skis — this is how you’ll turn when skiing.
To skate we step onto a FLAT ski to glide then we TILT or EDGE that ski to the inside to get even bite all along it and step/push/kick off of it to the other side. We kick off an edged ski. And we glide on a flat ski. Our skis smoothly roll from being placed down flat to rolling onto their edge as we kick. What’s cool, tho, is that they’re gliding all the time! …But they glide most when riding flat on the snow. And to glide nice and flat we need to have all our weight on a ski. To kick off an edged ski we will flex our knee and ankle more than they already are and push and put MORE than our bodyweight onto that ski to propel us down the trail.
Skiing! …Well, HALF of it!
Find a flat place and take your poles off and set them aside. Let’s ski without poles. Point your skis in a 40-deg Vee and rock back and forth from one foot to the other with your knees/ankles flexing, pushing to the side, straightening and gently lifting off the snow to the side. You should be moving! Quite easily. Add arm swings to the sides to help you with the rocking. Opposite arm and leg. Moving more! Now add more of a bounce to your leg flex. Moving even more! There’s some glide now! Now swing your arms fore and aft in time with your legs. Opposite timing just as if you were walking or running.
As you can get more power and glide more, you might start “washing out” the front of your ski. This means you’re pushing with your toe. It also means you’re pushing too late: you’re stepping over to the other ski partially THEN pushing, so there’s less weight on the push-ski when you push and it washes out. To fix that, visualize pressing each push-knee down to the area of the ski in front of the binding. Push when your weight is centered over the ski then step over to the other ski.
Try to recoil off of one foot and get a good glide onto the other foot — and stand up momentarily on that gliding foot and put your off-hand up to your brow and pretend to “scout” and look off to the horizon. This will inspire you to a longer glide and a more upright posture when you’re gliding.
Skate from side to side and give a hop on each foot once you’re over onto it. This also teaches you to stand up on the gliding ski.
Try to skate up a slight hill — swing your arms and bounce from side-to-side and compare swinging arms fore and aft and side to side.
We’re Skiing!
FINALLY! …Put poles on! Do it right — hand up thru, then grab down onto strap and pole.
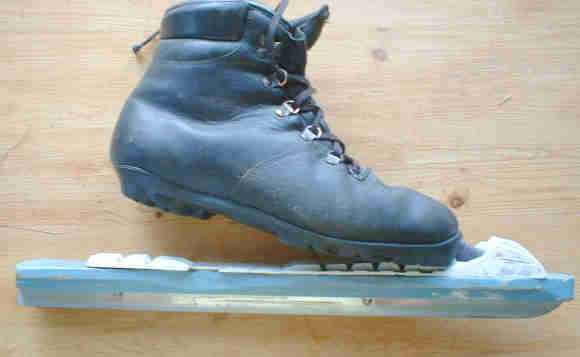
Skate poles should be as tall as your chin or nose (or between) when you’re not on your skis. …but really you can skate with any poles on any skis! (if you’re using waxable striding skis try to scrape off the kickwax first so you don’t have needless grip in the midsection. Nowax skis will work a LITTLE bit for skating, but not really.) real skate boots also are good because they resist bending at the toe, helping you push with your whole foot and supporting your foot while you do so.
Skate around using your poles. Use a pole action just like how you walk or run. One pole on one side at a time, opposite from your foot-push. This pole action is the same as for stride skiing. This is your lowest skate-gear. You can go up a steep hill doing this. It’s called the “diagonal skate.”
To pole, plant the basket near your feet, maybe a bit behind them. Your hands should be in front of you, close to you, with your arms bent about 90degrees when they plant. When you push you’ll drop your weight onto the poles in a ‘crunch’ action and you’ll push your hands at your baskets until your hands are just past your hips.
It’s ok if your hands are more in front of you or out to your sides but in those cases they are being used more like outriggers, for balance more than propulsion. Whenever you push down on a handle and the basket is right below that handle your force is only support, no propulsion. Your poles only help you move if the baskets are planted BEHIND the grips/hands — if they are angled to the rear and if your hands are somewhat close to your body. If your arms have a good bend in them then your upper body, back and torso-weight can help you pole. If you just use your arms you will be much weaker and get tired much more quickly.
You can practice poling on a flat or slight downhill using only your upper body and not your arms by getting into a track and holding your arms fully bent and tight against your body. Now just make little rocking crunches of your torso. Drop your knees a bit for power then stand up to recover. You can pole along pretty well like this, not using any arm action at all.
It’s good to tilt forward a bit as you plant your poles and to “fall onto” your pole-straps. That gives good power and helps with good posture. To do this, try to deepen your ankle bend and slightly increase your knee flex. Do not bend more at your waist.
STOP FOR A SQUIRT OF APPLE JUICE AND A SNACK!!!
Now for Real Skiing!
Now we will learn the most versatile skate move: the V1. (it’s called other things in other countries. Canadians say “offset.”).
It’s about the only ski-skate move you need. You can go fast with it. You can ‘gear down’ with it and go up a steep hill. And anything in between.
This move has a power-side and a glide-side. But there is glide and power on both sides. One just often gets a little more than the other. You can play with it and vary it to what you like.
In V1 we doublepole AND kick at the same time off of one side onto the other side. On the other side we can rest a bit, or not, as needed or liked, but all we do is just skate off of this “weak side” or “off side” and fall back onto the “strong side” for another simultaneous pole and kick. Now… The strongside pole and kick don’t happen exactly at the same time nor do they each last as long but they START all at once. We fall onto BOTH poles and the ski at the same time.
To change the “gearing” of this move all we do is change the angle of the vee of the skis and the timing of the kicking. The faster we go the more we glide on the power-ski and the more we delay kicking on the power-ski. We can also change how long we glide on the offside.
Going up a steep hill, we vee out our skis a lot and use our poles and kick immediately to combine all our forces to give us a nice “low” gear for easy hill-climbing.
For going fast on a flat, we delay our kicking until after our poling to stretch out the power and give us a “bigger” gear for more speed and less leverage.
So! To learn how to do the V1 we should take our poles and skis off again. We will step from side to side flinging our arms in a doublepole motion on one side and not on the other. We will move in a pattern like “3” and “1”. …2 poles falling down and 1 foot (3) pushing off of one side then just stepping to the other side and raising the arms again getting ready to fall/step back over to the other side. 3 1 3 1 3 1. It usually takes SEEING this on a video or in person to “get it.” Hard to describe in text. But give it a try!
As you learn V1 you might sense that you can use a TWISTING motion as you pole from the strongside to the weakside. We do like our body and weight to go from ski to ski but we want to keep ourselves pointing DOWN THE TRAIL rather than pointing from one side to the other with our shoulders or hips. To tell if your bodyweight is in the right place your knee and even your nose might be right over the top of your each ski. But face down the trail.
Up We Go!
So, to go up hills, just shorten up both your poling and your kicking.
Try light flicky moves — on the flats, then also on the uphills.
Here’s a tip to get a better feel for skating up a hill, and to find a posture that saves your energy: splay your skis in a vee at the bottom of the hill, pointing up the hill, drop your butt then tilt forward at your ankles, then rock from ski to ski, now add your V1 poling motion to assist then add more leg action.
The steeper the uphill the more vee-splay you’ll have but still keep your motions light and short and keep your chest pointed up the hill and pole with both hands shoving back down the hill. Press your shin toward the top of each ski.
The steeper the uphill or the slower you’re going the more your V1 hands will be offset, with one hand high and the other lower.
Breathe “deep deep easy easy” — let hanging from the poles help you let your belly sag and let your poling help you to ‘woof’ exhale.
(STOP FOR A SQUIRT OF APPLE JUICE AND A SNACK!)
The faster you’re going and the flatter is the terrain the later you’ll kick after poling. And the more your skis will point down the trail rather than to the sides. You’ll be able to enjoy what’s called “ride’n’glide.” You’ll fall onto a flat ski in the “3” mode, pole, then delay some with your weak leg just kinda dangling under you and your power leg kinda straight under you, too, relaxed, then it will flex and kick over to the weakside where you’ll land on a flat ski and just hang there as well on kind of a straight leg with your power leg kind of hanging as you rocket along. This is called “bone on bone” skiing, where you have a naturally balanced phase on each ski that doesn’t use much muscle or tension in either leg and where the offleg just hangs for a moment.
STOP FOR A SQUIRT OF APPLE JUICE AND A SNACK!!!
The Full Enchilada
Here are the 5 gears of ski-skating: Diagonal skate > V1 > V2 > V2A > Freeskate.
We’ve already gotten a feel for V1.
V2 and V2A have different poling patterns and other nuance differences compared to V1. They’re fun and not too hard. They are somewhat faster moves than the V1 — meaning, you use them when you’re already going faster than with V1. No technique “gives” you anything for free. Lots of skiers just use the V1 and play with that move to go faster or slower without needing any V2 or V2A at all. So you won’t be missing out, especially early on, if you skip them — though, of course, like all skiing, they are fun!
For V2 you want to be able to do it nice and relaxed on dryland before trying it with skis on snow.
It’s important to note that for V2 you really want ultralight carbon poles! They make it a lot easier.
V2 requires more balance: but it’s not static balance. It’s learning to, at first, reduce the range of some motions to optimize your dynamic balance. That is, don’t fling your arms or legs much. That way, it’s easier to balance.
Really, with all ski moves you’re never “trying†to balance. If you are, it’s wrong. “Trying†sounds like straining and seems unpleasant to me. Why not just “do†instead. Don’t forget: all skiing is fun, even the learning! So when a move needs more balance do what gives balance. The balancing comes from doing it right, at the right time, with the right gear.
When V2 goes wrong, people often find themselves tipping over to the outside, or bogging down, or speeding up in tempo uncontrollably as they rush each move a little quicker to catch themselves and stay balanced. But none of these problems mean that V2 is “harder.” Or that it “takes more work.” You just need some help.
If you tip to the outside, try stepping a little wider from side to side. We tend to get lazy and step down too soon, before we’re done pushing off the other foot so our momentum tips us outward — be sure to get that foot out far enough to be under you when your push is done. Or, think about weighting your big toe so that your weight doesn’t get out toward your little toe on your foot. If you find yourself waddling and falling back to the inside then visualize weighting your little toe more, or don’t step out as far. Do a little more dryland side-hopping til you can do it very relaxed, even w your eyes shut. Little things can help a lot.
If you bog down and feel like you’re exerting hard with each poling, just don’t follow-thru as much on the poling — use a light ‘tap’ to keep the tempo up yet without working too much.
So start with short, small, light moves when learning, especially with V2. Avoid too much torso action: V2 doesn’t use much anyway.
Remember: grandmas can do all-out moves, relaxed, at what seem like slow speeds… until they pass you. So, figure ’em out for going slow then use ’em for going fast.
There’s a dictum in cyclocross that “slow is smooth is fast.†Skiers can use it, too!
V2-Alternate is quite easy and fun because it uses the most arm-flinging and “biggest” motions yet feels natural and stable on both sides of the stroke. You may well naturally fall into it on faster, somewhat downhill sections. Optimizing it takes more work, though, including this key detail: to get more speed from your weak-side skate-off whip your arms upward forcefully. The harder you whip them up the more force gets applied downward to your kick – your arms can help your legs. It’s also fun getting comfortable with the hang-time aspects of this move, especially when your arms are done poling and they fly out like outriggers.
We’ve already done the no-poles Freeskate when we were first learning to skate. But now you could try it down a hill to go as fast as you can! Your poles are still on, but you fling your hands from side to side, holding the pole baskets out to the sides. Or if you’re going too fast for that, tuck them under your arms. Then after that’s too much, just tuck and glide!
Down, Down, Down!
To just glide down hills, get in the ready stance. To get more comfy yet on downhills, practice shuffling from foot to foot while gliding down. Move from side to side across the trail as you glide down. Now practice stepping and shuffling your feet around a downhill corner.
Our method for control on downhills is the same as with alpine skiing: hands “on steering wheel” in front of you, in boxer or wrestler position, or lower. Shins pressed forward (to get control with alpine skis we press shins into the front of our boots) that weights the tips and lets them bite and work to keep us safe. In the end, make sure your feet are evenly weighted from heel to toe. Stay out of the “back seat” — if your weight goes back onto your heels even a little bit your hands will start to rise up and reach out and drift back — you become unstable, get stressed, and risk crashing.
Once you feel stable, get in a track and try to rest on a downhill. It’s easy to glide in a set track. It’s a safe place where your skis won’t go in any strange new direction. It’s lke they’re locked onto a railroad track. Tuck your poles under your arms. Drop down. Try a few postures to see how they feel and how they might be good for you: hinge from the waist with straight legs resting. Or, drop torso to thighs to get into an aero egg shape. Keep your hands together in front.
Hit the Deck!
If you’re going to crash or just want to bail out, sit back on your tails and slide down on your butt on top of your ski tails. You will still slide but more slowly. You can also just flop back to the side on a butt cheek then put your skis below you and across the trail then stand up and side step or snowplow down the hill.
Braking and Stopping!
To brake you’ll snowplow with each ski — weight, unweight, set an edge and skid. Try one foot then the other as you go down a hill. Put all your weight on one foot, lift up the other, move the heel out, set it back down while tilt the ski onto its inside edge, then weight it and skid it some. Play with how much edging and weighting you do with it. Then try both feet at once — push down with your feet, now they’re unweighted so shove them out and then weight them. Go between light and tiny snowplows and extreme skid-braking. Notice how a snowplow can help you turn. You can use the snowplow to stay in control on fast downhill turns.
You can also easily do a hockey stop. Unweight a ski and set it out in a snowplow, weight it and start skidding, then lift your other, rear ski and set it parallel alongside the first ski and weight it also, edging it away from where you’re going. Hockey stop. You can also unweight both skis at the same time by dropping down then extending your legs then pivoting both skis together and setting them both on edge. Hockey stop.
With ski-skating you’ll want to learn to take care of your ski bases and to wax their whole length with a glidewax that matches the temperature of snow, then to scrape and brush and structure your base. Of course you can have a shop do that, or the rentals place already does it. So we’ll worry about that later. But creating your own rocket-fast skis is a fun part of skiing!
Best Wishes!
This is enough to do ya for now!
You’ve probably been at it a good hour by now. Either the reading or the skiing!
Time for another swig and snack!
